What’s better than a “to do” app? A “to do” app that helps you do more with the power of AI! Using Microsoft.Extensions.AI, you can easily bring the smarts of any model you find in AI Foundry directly into your mobile and desktop .NET MAUI applications. To demonstrate this, I’ll show you how to take the first step towards making our .NET MAUI sample content application intelligent. When the user creates a new project in the app, we’ll have AI generate a good set of tasks to get them going.
Getting Started
To quickly get started you’ll need an Azure service account where you can configure your AI Foundry model agent, and an app in which to consume and use that service.
Let’s start at AI Foundry.
AI Foundry
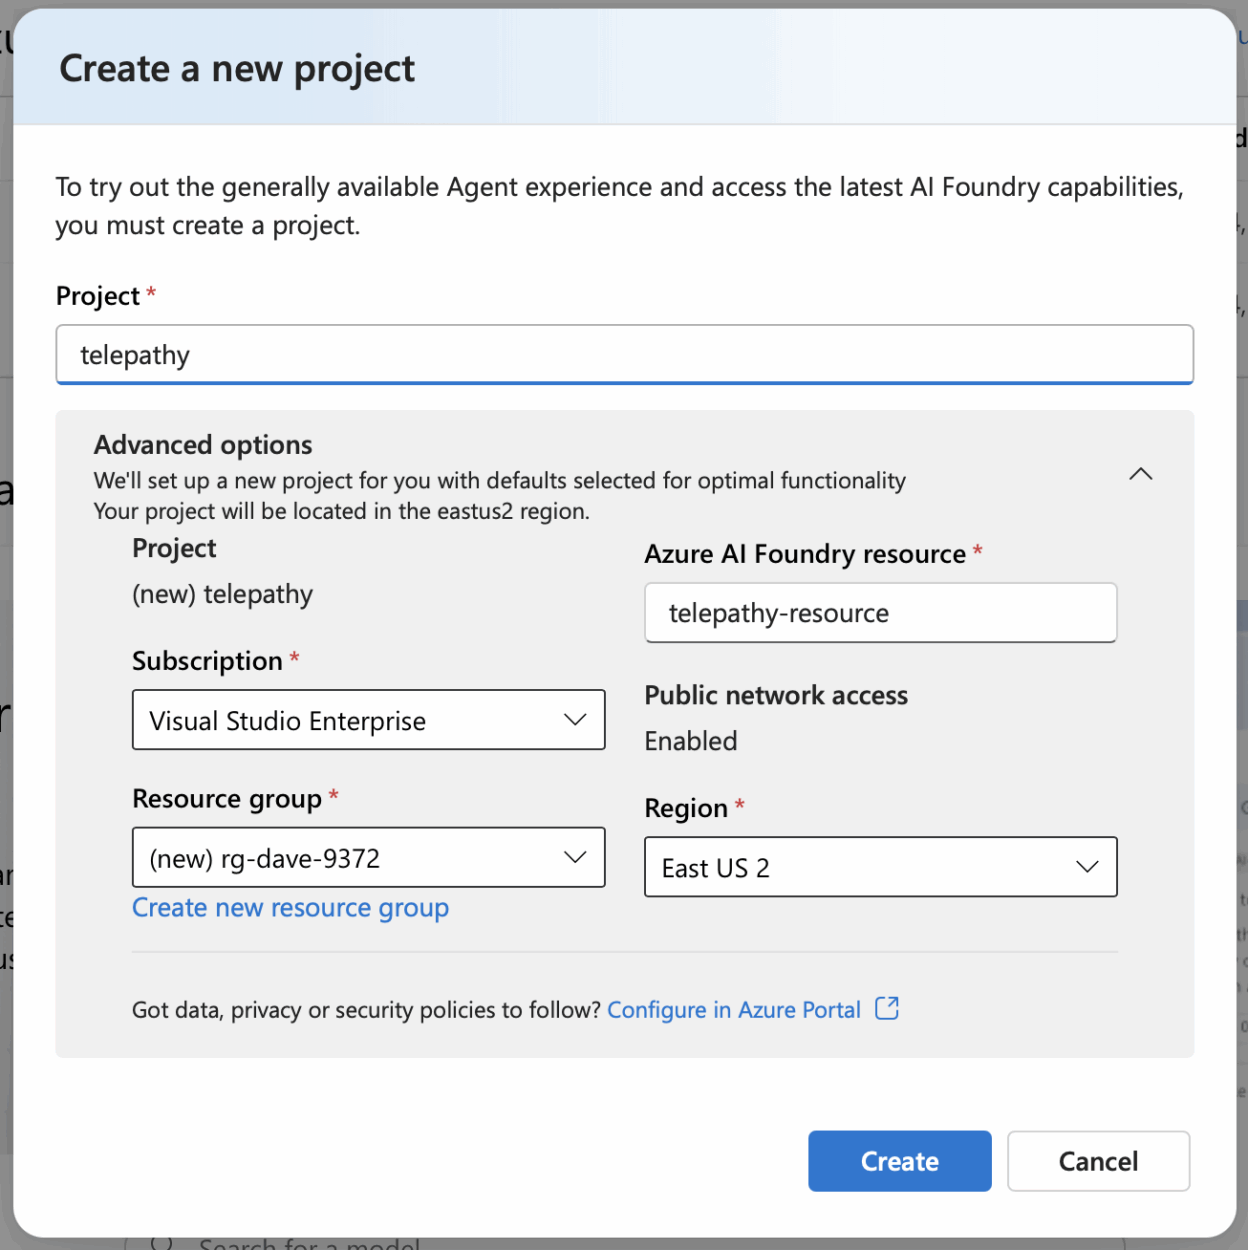
Login at ai.azure.com and click Create an agent. Give the project a name, and create it with the defaults. Opening the project details you’ll see various endpoints you can now use to call the agent.

By default, you’ll get the gpt-4o model, which you can see when you select My Assets > Models + endpoints from the menu. Later, you should browse the Model catalog to choose something more aligned with your goals, but for now we’ll stick with the default.
Make note of your primary endpoint and your API key as you’ll need those next.

.NET MAUI
In .NET 9 we introduced a new “to do” app template option that brings a bunch of the most popular libraries for building modern applications like the new open source Syncfusion Toolkit for .NET MAUI, .NET MAUI Community Toolkit, and MVVM Toolkit. To get started with this template, select the checkbox in Visual Studio (or choose the option in Visual Studio Code) for “sample content”. You can also include this option on the command line.
dotnet new maui -n Telepathy --scAfter you hit F5 to make sure everything restores and runs, go ahead and add the latest version of the Microsoft.Extensions.AI NuGet package using your favorite NuGet package manager, or again the handy command line.
dotnet add package Microsoft.Extensions.AIBefore you start writing code, you are going to need that endpoint and API key in the app. You absolutely do not want to add them to your source code where anyone can get at them even when distributing through public app stores. In most cases you would have a web service where you authenticate the user and then handle the calls securely behind that in the cloud. For this quick sample, let’s use environment variables which work easily for desktop.
Warning
Never include API keys or sensitive credentials directly in your source code. For production applications, use secure authentication services and key management systems.
Create the Chat Client
Using Microsoft.Extensions.AI you can create a new IChatClient instance from which to send prompts to the AI Foundry endpoint, and receive back a strongly typed response. The same works with OpenAI, Ollama, and even ONNX for local and embedded models. Open the MauiProgram file and instantiate a new client that you can add to the services collection.
public static class MauiProgram
{
    public static MauiApp CreateMauiApp()
    {
        var builder = MauiApp.CreateBuilder().UseMauiApp<App>();

        var endpoint = Environment.GetEnvironmentVariable("AI_Foundry_Endpoint");
        var apiKey = Environment.GetEnvironmentVariable("AI_Foundry_ApiKey");
        var foundryClient = new AzureOpenAIClient(new Uri(endpoint),new System.ClientModel.ApiKeyCredential(apiKey));
        var chatClient = foundryClient.GetChatClient("gpt-4o").AsIChatClient();

        builder.Services.AddChatClient(chatClient);

        return builder.Build();
    }
}
Send the prompt, receive the smarts
Now open the ProjectDetailPage and ProjectDetailPageModel where you will use the chat client. When the user is done creating a title for the project you’ll listen to the Unfocus event of the Entry control to signal to the view model that it can retrieve tasks based on that title.
In the ProjectDetailPage subscribe to the Entry.Unfocus using a convenient event to command behavior from the .NET Community Toolkit for .NET MAUI.
<Entry
    Text="{Binding Name}">
    <Entry.Behaviors>
        <toolkit:EventToCommandBehavior EventName="Unfocused" Command="{Binding NameUnfocusedCommand}"/>
    </Entry.Behaviors>
</Entry>
The binding context for this page is ProjectDetailPageModel, so add a command there to implement NameUnfocusedCommand. For this you’ll use the RelayCommand from the .NET Community MVVM Toolkit.
[RelayCommand]
async Task NameUnfocused()
{
    // Only trigger if new project and no tasks
    if (_project != null && _project.IsNullOrNew() && !string.IsNullOrWhiteSpace(Name) && (Tasks == null || Tasks.Count == 0))
    {
        await GetRecommendationsAsync(Name);
    }
}
And now you are finally ready to make the magic call to AI Foundry from GetRecommendationsAsync. The chatClient comes from the services container via constructor injection, and you can provide the object type you want returned (RecommendationResponse) when calling GetResponseAsync.
partial class ProjectDetailPageModel : ObservableObject
{
    IChatClient _chatClient;

    public ProjectDetailPageModel(IChatClient chatClient)
    {
        _chatClient = chatClient;
    }

    private async Task GetRecommendationsAsync(string projectName)
    {
        try
        {
            var categoryTitles = Categories?.Select(c => c.Title).ToList() ?? new List<string>();

            var prompt = $"Given a project named '{projectName}', and these categories: {string.Join(", ", categoryTitles)}, pick the best matching category and suggest 3-7 tasks for this project.";

            var response = await _chatClient.GetResponseAsync<RecommendationResponse>(prompt);

        if (response?.Result != null)
            {
                var rec = response.Result;

                var recommendedTasks = new List<ProjectTask>();
                foreach (var t in rec.Tasks)
                {
                    recommendedTasks.Add(new ProjectTask { Title = t, IsRecommendation = true });
                }
                RecommendedTasks = recommendedTasks;
            }
        }
        catch (InvalidOperationException ex)
        {
            _errorHandler.HandleError(new Exception("Chat client is not initialized. Please add your OpenAI API key in settings.", ex));
        }
        catch (Exception ex)
        {
            _errorHandler.HandleError(ex);
        }
        finally
        {
            IsBusy = false;
        }
    }
}
Back in the ProjectDetailPage you’ll then want to render the RecommendedTasks for the user to accept or reject.
To see a completed sample with even more AI features, check out the Telepathy sample and our breakout session from Microsoft Build 2025, AI infused mobile and desktop app development with .NET MAUI.
Resources
- Microsoft.Extensions.AI Documentation
- Azure AI Foundry
- .NET MAUI Documentation
- Telepathy Sample Application
- .NET Community Toolkit
- Syncfusion Toolkit for .NET MAUI
- .NET MAUI Community Toolkit
- MVVM Toolkit
Summary
In this article, I’ve demonstrated how to integrate AI Foundry with your .NET MAUI applications using Microsoft.Extensions.AI. By following these steps, you can enhance your mobile and desktop applications with intelligent features powered by large language models. Start experimenting with AI in your .NET MAUI apps today!
The post Using AI Foundry with .NET MAUI appeared first on .NET Blog.